Cabinet Refinishing – Revamp Your Kitchen’s Cabinets

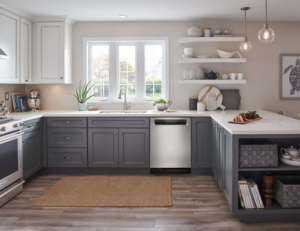
The cabinets in your kitchen make a huge impact on the overall look and feel of the room. If they are old and outdated it may be time to consider cabinet refinishing.

Cabinet Refinishing

But is it really worth it? Is this a cost-effective way to update your cabinets? Keep reading to learn more about San Jose Cabinet Refinishing.

Cabinet refinishing is a much more cost-effective option than refacing, and can save homeowners up to 50%. Refacing costs upwards of $5,500 on average and requires the demolition and installation of new cabinet doors and drawer fronts. Cabinet refinishing, on the other hand, typically costs no more than $1,500 on average, and is perfect for those who want to update their cabinets but don’t have the budget to replace them.

Before any work can begin, the cabinet surfaces will need to be prepped. This will involve stripping any existing paint, repairing any cracks or holes, and sanding the surfaces to prepare them for a fresh coat of stain or paint. If necessary, the cabinet boxes will also need to be repaired. This is a time-intensive project, and many homeowners find that they need to hire professionals for this job to ensure that the work is done properly.

The type of material used on the cabinet doors and drawer fronts will also impact the refinishing process. For example, thermofoil and laminate can’t be refinished, as they don’t have the proper substrate to hold the stain or paint. Solid-color cabinets, on the other hand, are usually made of medium-density fiberboard (MDF), which can be refinished. This is a good option for homeowners who don’t want to commit to replacing their kitchen cabinets, but would like a change in color.

Reusing hardware is another great way to save money on a cabinet refinishing project. If your existing hardware matches the new aesthetic, there’s no need to purchase new knobs and pulls, which can be expensive. Homeowners who are looking to save even more can opt to use polyurethane instead of solvent-borne lacquer when refinishing their cabinets, as this finish is less expensive.

While it is possible to refinish your cabinets yourself, the project is a huge undertaking and should be left to professional technicians with years of experience. It’s important to do your research when hiring someone for this task, and ask questions about their previous experiences with refinishing projects. Homeowners should also be sure to get multiple quotes from different contractors before making a decision.

Time-Saving

Cabinet refinishing involves working with existing doors and cabinets to change their color. This process is much faster and easier than replacing them with new ones. It’s also a more eco-conscious option since the original materials are reused, rather than discarded and end up in landfills where they can leach chemicals into soil and water.

Refinishing is a great choice if you’re looking to upgrade your kitchen without breaking the bank. But it’s important to know that this project can be difficult for DIYers. It requires a lot of work and a good understanding of the process. It’s also important to use proper prep and safety procedures, as improper handling of chemicals and sanding can cause damage that may be costly to repair.

To start, you’ll need a variety of tools and supplies. This includes a sanding machine and sandpaper, paint or stain, a sprayer or brush, a drop cloth, and protective gear such as masks and gloves. It’s also a good idea to have a helper to assist you with the heavy lifting.

Before you begin, it’s important to sand the cabinets and scuff them to give them “tooth” and promote adhesion. Make sure to sand the entire surface, including edges and corners. Once the sanding is complete, you can vacuum and tack the area to remove any residual dust. It’s also a good idea at this point to seal the cabinets with a high-quality primer, especially if you’re moving from a dark to light color.

Once the primer has dried, you can begin painting or staining. It’s a good idea to use a high-quality acrylic latex or enamel for best results. A good quality finish will protect the cabinets from daily wear and tear and will look great for years to come.

Refinishing is not as extensive as refacing, but it can be more time-consuming. The main difference between refacing and refinishing is that refacing involves removing the hinges, handles, and hardware from the cabinets, as well as sanding down the existing structures. A refacing job can be completed in a day or two, but it can take up to four days to complete a refinishing project.

Aesthetically-Appealing

Cabinet refinishing is an effective and cost-efficient way to revitalize your home’s appearance. This transformative process allows you to customize your living spaces with a fresh coat of paint or stain that aligns with current design trends and reflects your personal style.

The refinishing process begins with a thorough cleaning and degreasing of the cabinets, ensuring that the new finish will adhere seamlessly. This is a crucial step because if the cabinets are not properly prepared, it can lead to unsatisfactory results and premature wear and tear.

A professional cabinet refinishing company will strip the existing finish in order to prepare the wood for a new coat of stain or paint. This is done by using a chemical stripping agent or through lots of sanding. It is important that the existing finish is completely stripped so that the new coating will adhere properly. If the new coating does not adhere, it can cause sagging and chipping. It is also crucial that the new stain or paint used is formulated specifically for cabinetry. Regular paint bought in a store is not made to withstand the moisture that is found in kitchens and bathrooms, so it will begin to peel or fade quickly.

During the refinishing process, any cracks or chips in the cabinets will be repaired, and any water damage will be treated with appropriate drying and sanding methods. This will ensure that your newly refinished cabinets will be durable and beautiful for years to come.

Whether you are looking for a classic white finish or something bolder, there is a wide range of color options available. Many homeowners choose to contrast their upper and lower cabinets with complementary colors, creating a dynamic effect that can dramatically alter the ambiance of your space. Moreover, the choice of cabinet hardware is another element that can make or break the look of your space. From simple knobs and pulls to elaborate handles, there is a wide selection of styles to choose from. This makes it easy to find the perfect match for your unique space.

Easy to Do

Cabinet refinishing is an easy DIY project and it’s much more affordable than buying new cabinets. The key to a successful project is proper prep and planning. Start by protecting the surrounding surfaces with plastic sheeting or building paper (which is more eco-friendly). This will protect your countertops, appliances, table and chairs from dust and sanding during the process.

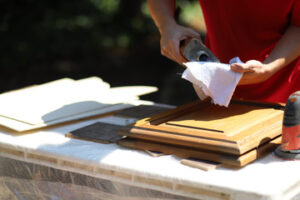
The next step is to sand the existing finish down to the raw wood. You can use either a hand-held sanding sponge or an orbital sander. Be sure to sand the edges of each cabinet and any nooks and crannies to make them smooth. Once you’ve sanded the cabinet, clean it with furniture cleaner or a designated stripper in a well-ventilated area. After you’ve cleaned the surface, sand it again with medium-grit sandpaper and then 180-grit sandpaper on the orbital sander to smooth it out. Then vacuum the cabinet and tack rag off all remaining dust.

When it comes to painting, it’s important to choose a high-quality paint and primer that’s made for cabinets. Using standard acrylic or latex paint will eventually peel and chip, especially in high-traffic areas. Also, be sure to apply several coats of paint and wait for each one to dry before applying another. It’s also a good idea to experiment with your colors on a piece of scrap wood before you commit to any final decision.

If you want to give your cabinets a darker look, staining is a great option. The staining process is more involved than painting, but it’s still relatively easy. You can buy staining kits at most home improvement stores, and you’ll need to follow the instructions for your specific type of cabinet. Once you’ve stained your cabinet, it’s a good idea to wipe it down with mineral spirits and then tack-rag off the residue. Once it’s dry, you can re-tack the cabinet and apply a protective varnish.

Kitchen Remodeling – Cabinets Are the Heart of Your Kitchen

When considering a kitchen remodel it’s important to define your goals. Your contractor can help with this during your consultation.

Make sure your budget covers all of the must-have features you want to see in your new kitchen. For example, framed mirrors are a great way to open up the space and can be cheaper than new windows. Contact Kitchen Remodeling Tacoma WA now!

Cabinets are the heart of any kitchen and can have a major impact on your room’s overall design. Replacing them may be part of your kitchen remodel, but simply rearranging cabinets can also give the space a new identity. Whether you’re going for a bold color makeover or simply want to add more storage, there are several ways to update your cabinets without blowing your budget.

Many homeowners opt to simply reface their existing cabinets rather than replace them entirely. Suitable for DIYers or a professional crew, refacing involves applying adhesive-backed veneer to the cabinets’ surfaces. This gives them a fresh look at a fraction of the cost of replacing them.

The carcass of a cabinet is usually made from wood, although less expensive options such as MDF and particleboard are often covered with melamine or thermofoil to avoid costly replacement in the future. The surface of the cabinet can be finished with paint or a clear finish such as lacquer to match your decor.

You can also add additional cabinets to your kitchen, using wall spaces that currently contain bare studs or other unfinished elements. In addition to increasing your storage capacity, adding upper cabinets can provide a workspace that is separate from the cooking area for tasks like paperwork and meal planning. You can even turn empty wall space into a pantry by installing shelves. Organizing your cabinets can also increase efficiency by creating designated zones for supplies, food and work tools. For example, you can use a wall cabinet as a pantry by adding a shelf and removing the doors, or you could turn an upper cabinet into a desk by adding a countertop and some shelving.

Countertops

Countertops are one of the most visible elements in any kitchen. They’re also the hardest working and must endure an onslaught of sharp objects, hot cooking utensils, liquids, food and cleaning products. So it’s no surprise that they can be a source of frustration when they get damaged or worn out. Replacing your countertops is a great way to refresh the look of your entire kitchen and, in many cases, improve functionality.

When choosing countertops, consider your personal design aesthetic. Quartz, solid surface and granite countertops are popular choices that create a modern and minimalist feel. Marble and tile can add a traditional and high-end vibe to your kitchen, while wood and copper can create an eclectic or cottage-core style.

Laminate countertops are often the most budget-friendly option, and they’re available in a wide array of patterns. However, because they’re made from sheets of material glued together, laminate can be susceptible to bubbling, crazing and other damage, which can be costly to repair or replace.

If your current countertop is in good condition but just needs a facelift, adding a backsplash (UK: upstand) is an inexpensive and easy way to breathe new life into it. Besides protecting walls from splashes and spills, backsplashes can be an attractive feature in their own right by using different materials, colors, textures and patterns. They’re also a smart choice for those who want to keep the same basic look of their kitchen but add an element of fun or personality. They’re also an effective alternative to tile or natural stone backsplashes, which can be more expensive.

Flooring

While some people are capable of replacing countertops, installing a backsplash and re-doing their cabinets on their own, a full kitchen remodel is often best left to professionals. This is especially true for projects that involve plumbing or electrical work.

A full kitchen remodel may be cosmetic or structural, ranging from simple upgrades of surfaces and appliances to major renovations that can take your kitchen right down to the studs and rebuild it. It may even include knocking down walls to open the space or integrating it into other living areas for an open-concept design.

One of the most important aspects of any kitchen remodeling project is laying down new floors. A professional can install laminate, vinyl or wood flooring, all of which are durable and easy to clean. Hardwood floors are also a major selling point to potential buyers. Realtors estimate that homeowners can recoup 118% of their investment on new hardwood floors and 147% for refinishing existing ones.

Once the floors are installed, cabinets and countertop installation can proceed. Then, backsplash tile and other wall treatments can go in. Finally, appliances can go in, but since they usually slide into cabinet and countertop spaces, this is usually done after the cabinets are in place.

While it’s tempting to make many bold design choices – from a colorful floor tile to an interesting backsplash pattern – limit them to one or two elements. Overdoing it can overwhelm the room and look chaotic instead of upscale. To create a cohesive look, choose paint colors that coordinate with the floor and backsplash tiles. Then add decorative hardware and window treatments for the finishing touches. This will ensure a smooth and professional finish.

Plumbing

The first step in a kitchen renovation is to decide on the scope of the project, which Ariana Lovato, owner of Honeycomb Design in Shell Beach, California calls “the planning stage.” This can range from a minor cosmetic refresh to a complete gut job that may involve tearing down walls and reconfiguring the layout. Regardless of the scope, it is important to make a list of what will stay and what will change. This will help determine where to place fixtures and whether any pipes will need to be moved.

Plumbing is an essential component in any kitchen remodel. Changing your sink’s location to a more convenient spot requires moving pipes, which adds up in labor costs. If you’re going to upgrade to a new refrigerator that comes with an ice maker, for example, you’ll need a line running from the water supply to the fridge. Adding a dishwasher or garbage disposal will also require modification of your plumbing.

Depending on the goals of your remodel, you might want to consider replacing your old copper pipes with PEX or PVC, which have a 50- to 80-year lifespan. This can save you money on utility bills and prevent costly leaks down the road. You might also want to consider rerouting your pipes, which can improve your home’s water pressure and flow, if needed. This can be done during a remodel and is typically less expensive than doing it at a later date. You’ll need to bring in an experienced plumber for this type of work.

Electrical

The last thing you want is to have a beautiful new kitchen that’s not fully functional. That’s why kitchen remodeling often includes upgrading your home’s electrical system to meet the demands of modern appliances and lighting.

If you plan on adding or moving outlets during your remodel it’s important to talk with a licensed electrician before starting. They can help you plan your wiring needs and ensure that your home’s existing electrical system is up to the task.

In general, a kitchen will need at least two 20 amp, 120 volt circuits for lights and small appliances. The circuits should be no further than four feet apart. Additionally, a kitchen should have GFCI (ground fault circuit interrupters) outlets installed near sinks and countertops to prevent electrocution in case of water contact.

Depending on the scope of your project, it may also be necessary to upgrade your home’s main electrical panel or add a subpanel for the new kitchen circuits. These changes are typically a larger project that will require additional contractors.

When you’re done with the structural and utility work, your contractor can install the drywall and turn the space back into a kitchen. At this point, you can start planning your new kitchen layout and ordering your cabinets.

Most kitchen remodels will involve relocating or replacing fixtures and appliances. This can be time consuming and labor intensive but it is necessary to ensure that the new layout is safe and functional. An experienced professional can make the process go much more smoothly. They can help you save money by reducing the amount of demolition and waste and provide you with the best results.